Note: As mention on the other blog post for this week, I spread this week's blog post across two blog posts.
To differentiate from the Spitfire model, I wanted to plan out (albeit rough) and also, I thought it was best to look at other artists 3D models on Spitfires or other artist tutorials to see how they approach modeling a Spitfire.
I really want to improve from the first Spitfire model and not to make the same mistakes again. So as an exercise, I found models and analyze them and pulled them to part to see how they were formed. It's art 101 to analyze another
artist work (traditionally anyway) and to learn from it. Why not with games?
Art & Design Analysing an artist's work - what I looked at back when I did GCSE art - It has probably updated since I finished my GCSE's 8 years ago. But fundamentally it's the same.
Also, I looked at this article a while back that gave me the idea to look at other people's models and see what I can learn from them and what I should and should not do when it comes to my own model:
How to Be Inspired by Other Artists Without Copying Them.
This tutorial I found, though it did help my understanding, it wasn't the best of tutorials. However, it did give me great reference images to use whilst I create my Spitfire. I didn't watch all of this series, but enough to get an understanding of the form of the Spitfire
Maya 2013 intermediate modeling - Spitfire - 1 - Set up
Models I analyzed:
UK WW 2 Spitfire MK 1 3d model
DIVISION 303
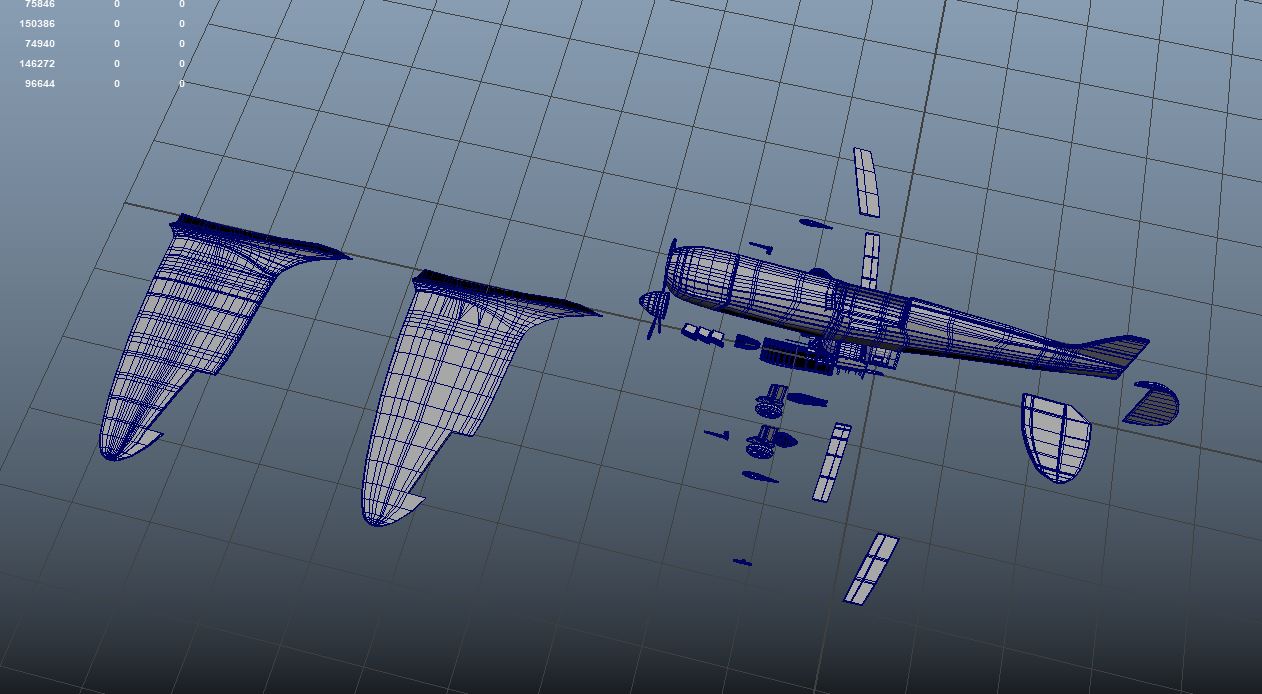
The First One:
One thing I noticed with this model is that every single section has its own UV set (cockpit, propellers, glass, pilot, left wing, right wing, main body, back part of the body and some other sections). I understand the pilot would definitely need its own UV set, but I don't think everything else needs several UV sets. Maybe one, or even two at most?
Note: I think it would be best if I put cockpit and the outer sections of the Spitfire on separate UV maps. Outer sections on a 4k map and the cockpit on a 2k map. Beforehand I laid out all of the Uvs on one 2k map. The textures would probably be so blurry.
Also, one thing I noticed about both models that the wings are attached to the main section and are separated. Perhaps I should do the same? To overcome the problem with the wing connecting to the main section, would this help?
Another thing I noticed is that the rear section and main section is separated. I'm not sure if I'm being an idiot, but I don't understand why they may have done this. Obviously, the flappy bits and rudder would need to be separated due to animation. But why the other bits separated? I think this might just come down to the artist's preference.
But overall, it's accurate to what a Spitfire looks like.
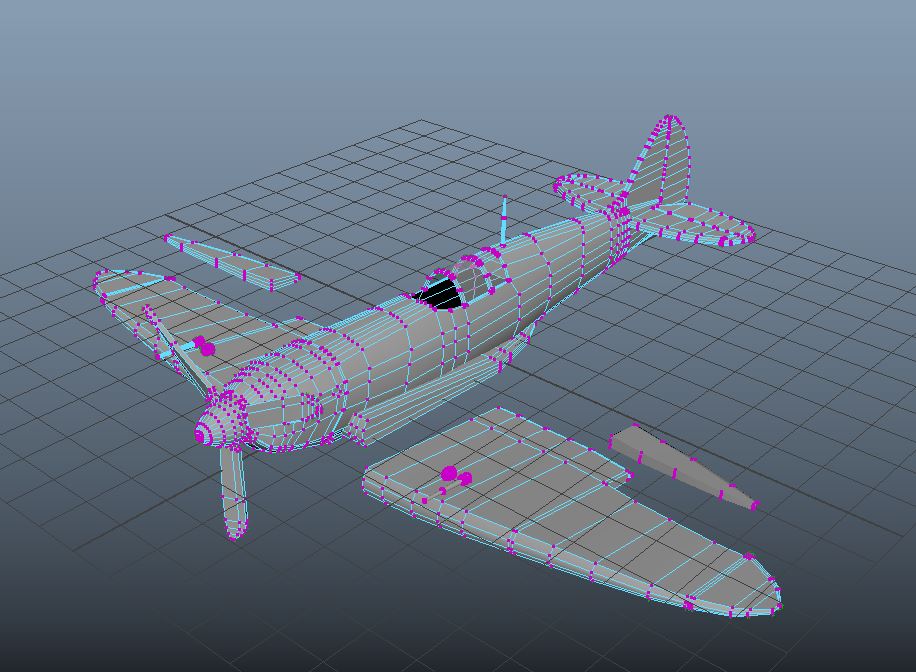
The Second One:
I think this model is more for animation than for games. However, the one thing that stands out to me is bolts are actual geometry. After a certain size, yeah it would need geometry but for this size, I think it would be wasted geometry that could be used somewhere else and should be normal mapped in. Also, a similar thing could be said about the panels at the front. They could be a high poly and baked onto a lower poly model. On both, the overall form is really good (especially compared to my original Spitfire model)
Also, one thing I did notice with both of these (minus both having pilot assets) they both don't have cockpits modeled in. Maybe for my asset, I should have a cockpit in.
Another thing I noticed is the section between the wing and the main body (the most problematic bit in my original Spitfire model) isn't connected. I think I may do this for my Spitfire model so I have more control over it.
In addition to looking at these, I notice sections I didn't really pick up on in the first Spitfire model or looking at references for the one I'm going to make for this project and that a flappy bit under wings (not the obvious main one you can see). Looking at these give me a new perspective of what I need to do. Also, both have the wire thing from the back rudder to the pole just begin the cockpit - may need to include this.
Also, probably me being an idiot. But, with this asset, I know games can cope with way more polygons but I'm not entirely sure. This is roughly 156k tris. I understand that games like the latest Final Fantasy have 100k polys for main characters but they would be the main focus and have the most screen time. I know the prime factor for poly count would depend on platform i.e. computer, console or mobile. I'm probably being an idiot, but for animation, it would be great, but in terms of a game maybe not. Probably wrong about this. But something to think about.
Out of these two, this is the most accurate Spitfire model - I know I won't be able to create something as good as this, but I did learn what I need to do to improve on.
As well as looking at these, I've found some on Sketchfab. Several are for a texture challenge, but I wanted to see how they approach texturing a Spitfire and to see how they went around presenting their work. Here are my favorite ones:
Spitfire texture challenge:
I love the movement on this one and the way it's presented. Also, look in the cockpit, there's a particular cartoon character inside it (I will admit, this made me chuckle).
I love the wear effect on this one.
This one has a lot of narrative in it, there's action and I love the flow and the way the fire reflects on the water. If the project lasted longer, I would love to do something similar to this! The presentational style is so good.
Out of all the Spitfire's I looked at, this one is my favorite. I know I have done stylized cel-shaded (albeit not very well) before but this looks amazing. Though I really want my project to look realistic, this is really cool.
Other ones found on Sketchfab:
Looking at this one, I'm not sure if it's meant to be stylized but the main thing that I keep looking at is that the wings are too thick for a Spitfire (Spitfire wings are very thin). The wear on the cockpit section is good but the entire thing looks a tad squished for a Spitfire. Also, the geometry looks very clean when I was looking at it.
Similar to the one above, the Spitfire looks very squished - Not sure if it's meant to be stylized again. Unlike the other ones, this has a cockpit inside it, though all normal mapped in.
Note: Though I won't do LODs for the Spitfire during this project. Looking at this gave me an idea that if I ever do LODs for the Spitfire I want to create for this project, for the LOD furthest away, I think I will back down the cockpit into textures (no need to have a fully modeled cockpit if you're looking at the Spitfire far away. Unlike the last one, the wings on this aren't too thick but still slightly too thick for the Spitfire (at least for the size of this Spitfire). Unlike the others, the stuff that probably should be on the normal maps are i.e. bolts and panels.
But one thing I noticed for this asset is that it's only 18k tris. I know I was saying one of the Spitfires above might have too many tris, but this (for a AAA console or PC game) it's very low poly. I need to aim above 20k tris for my Spitfire asset.
The form for this one looks spot on and the geometry looks good to a point (minus the back wing section, there's no bevel and has a very sharp single edge.
A common thing I notice with most of these Spitfires that the wings aren't connected to the main body. Also, the same problem as the one above, this Spitfire asset is only 16.1k tris - once again, not sure if it's meant to be stylized but this seems way too low.
Once again, I need to aim above 20k tris for my Spitfire asset I want to create for this project.
Overal, this was a very handy exercise. As I got an idea how I should lay out the topology, pay attention to the form (and certainly not start out with a cube primitive), the way I want the UV sets to be (one for the outer section and another for the cockpit). Also, it's made me way more picky with my model and not settle for less. It's made me want to push my modeling skills more.
My Gameplan:
After looking at these, I created a (very) simple sketch to break down the Spitfire into sections for modeling.
Also made a sketch with the Spitfire with added notes of its dimensions (length and height etc.)
As previously stated, after looking at the tutorial, though I didn't find it as helpful, I did, however, found the ref images from the tutorial helpful - As can be seen below:
Unlike the original model, I used a cylinder and as indicated by the red arrow, I extruded a section up to get the back end right.
As stated above, the exercise has made me pickier the way I model, to be more critical and not settle for less. I'm not happy with how the main section I created looks, I know it's only the start but I'm really not happy with the form. It's probably gonna take me a while to sort out the main section of the body.......
Note: To actually make the reflective journal/blog more legible and grammatically correct, I was suggested to use Grammarly. So far, it's helping, think I'll use it for the rest of the blog posts. Instead of the posts looking like a monkey have written them.
Also this week, I got some book out from the main library in Norwich that could help with this project.
Also, to help me keep on track, I've made a tracking sheet in Excel. This will help me with what I need to do, what I've complted, what I still need to do, if I'm ahead or behind on a task etc.