Showing posts with label ASU2. Show all posts

Tuesday, 1 May 2018

Evaluation

Evaluation for both SNU and ASU2

I do believe this project went really well and I am extremely happy with the final outcome for the project. I also really enjoyed doing the research for both project and I am glad that I treated them as one/complimentary projects. The thing I am most pleased about for ASU2 is the gargoyle asset and I am glad that I learnt how to use quad draw within UE4. For SNU, the thing I am the most pleased about is windows. Not because I made my dog into the Pope, I am really happy the way I set up the lighting for them and the last minute effect I used behind the windows to give the illusion of there being a room behind it. 
Looking at architecture has certainly helped for this project. Not for just planning but also to get the understanding of why elements in building are the way they are; how they are used; becoming more critical with my environments; the meaning behind elements. Looking at architecture has certainly made my scene way better. I will look more into architecture in the future as I believe learning more will help my 3D work more. Though I may not have used architectural techniques in the way I originally intended - I do believe in another way I implemented the architectural knowledge I acquired for this project into my design.  
What would I do different next time? 
One major thing I want to do differently next time is to push the polycount more and not worry about having the assets super low poly. Next project I will tailor it to make me push the polycount more than I do. 


The final countdown


On Monday, I added some more lights to make the gargoyle stand out more in the scene. I also added the bricks I done ages ago, but forgot about.


Yesterday, I try to add a plane in the background to fill out the dead spaces. However, this didn't really work. As seen in the image below:


In addition to this; I done a fly-through video using the sequencer in UE4. There was a minor problem with rendering, as UE4 didn't want to render it. I managed to some help with the technicians at NUA and done the render in sets - though it did cut bits out.
Turing a pain into a positive; cause of bits cut out of the video, it does look like I put in camera cuts and it look intentional.
So it turned out well, albeit by mistake.... 

Using the sequencer in UE4:


Fly-though video:


Tutor position at Paston Sixth Form College: Had my first day at Paston on Tuesday morning. It went well and I shall be back next week.

Friday, 27 April 2018

Almost there

From feedback, I created an outer section to the windows - Also redone some of the inner sections of the window. 


UE4 Renders: 

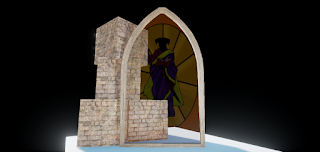
This week, I used vertex colouring on the back walls; made the flying buttresses thicker; added all the new window stuff; added LUTs in post processing; made sure all of the textures are aligned properly; sorted out the lighting; also added a bit to put behind the windows to give the illusion that there's something behind the window; I also played around the lighting I put behind the windows that now the lights will cast the colours of the stained glass window - I used the light function material to achieve this effect 


Note: this is the simple mesh I placed behind the main front windows to make it look like there's something behind the window - This effect is really effective. The other windows have just a simple plains


Example of the light function materiel I used for the lights behind a couple of the windows.


Note: I tried to rebake the normal map for this section below - no matter what I do, this section still remains black

Note: I also done a check list from feedback what I need to do for my scene in UE4. Instead of a normal check list, I done a visual check list:
I have to prioritize what need to be done first. I may not end up adding more geometry on some of the assets. Though I know that I need to push the geometry more, but with the time left I don't think I will have time to do that with all of the assets needed - as I will also have to re do the UV's, rebake and texture them and still do everything else I need to do within the time frame.

Uni/outside uni update: 

Exciting news! Because of NUA I now have a temp tutor job for Paston Sixth Form college covering 3D 

What I need to do next week: 
Finish up SNU evaluation; clean up scene in UE4 and present some of my work 

Friday, 20 April 2018

Getting there

This week I attempted to do a stylized gargoyle texture and create stylized textures in Designer. Don't think it went too well, but I know with more work I could create stylize textures. Though after small scale test (Task 3) I decided against using stylized textures for overall project for SNU and ASU2, I still wanted to see if I could create something stylized. Still haven't managed it.

UE4 render using uni computers


I also extended the walls and made them bigger, as the walls would look too small and wouldn't look good:
Also to save time, I reconstructed the flying buttresses sections in Maya, so all I have to do in UE4 is import them in.


 UE4 renders: 


Also, I extended the Pope Benson image for the windows: 


Sunday, 15 April 2018

Gargoyle sculpt - Continued

This week, I UV mapped, baked and textured the gargoyle asset - this was my main focus. I also added it into UE4 to test it out - though I realized that it would clip the wall of the flying buttress and so I decided to create a kinda little plinth for the gargoyle. But officially, the raven gargoyle is finished.

WIP render: 

 Final maps: 


Final renders: 


UE4 test: 


I also this week, I built more in UE4 and realign some of the textures on the back wall.

This week, I also spent some time placing all the textures on the right uv maps within Photoshop. There's probably a better way of doing this, but at the moment this is the only way I can think of. 

Sunday, 8 April 2018

Redo on Gargoyle

This week I finally decided to start the gargoyle from scratch again.


Biting proverbial bullet: I went back to quad draw in Maya after sculpting in Zbrush. 


This week I don't have much to post as I spent the week redoing the raven gargoyle sculpt and getting use to/using quad draw. It took me several days to get the hang of it but I am now beginning to enjoy using quad draw. I am generally looking forward to using it again

Saturday, 31 March 2018

Texturing

I haven't decided if yet if I should stick it out with current gargoyle sculpt or begin a new - I will decide by the end of the week for certain to stick it with it or start anew.

This week I decided to do a lot of texturing done and begin to place them in UE4, though I know it won't look amazing on my PC. But want to get some placement done.


To my own admission; I will add that I had a slight snafu with some of the UV's with the models. Some of the models I forgot with models are on which UV sets and also accidentally overlay some model UV's with other model UV's. So I had to re do these this week. Fortunately for me, I'm building a library of textures within Substance, so texturing is getting done quicker. 


Sunday, 25 March 2018

Pecha what you ma call it

This week I focused on getting my Pecha Kucha presentation. I also tried to re-position parts of my gargoyle asset, however I think it may be best to restart it. I'm going to debate this and if I do scrap current gargoyle sculpt, I shall start from scratch next week.

Trying to edit current Zbrush raven gargoyle sculpt:


Also, the numpty that I am forgot to add (again) a couple of weeks ago that I decided to add a roof to my cathedral asset. Seen below with baked normals

Back to this week's post. 
Substance graph: 

I also made a roof tile base version were I don't have the normals for the tiles 

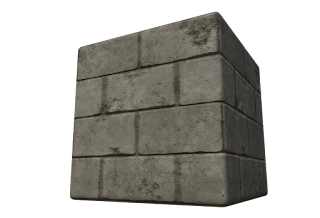
In addition to this, I redone the brick texture so the brick size is bigger. Also make a very less worn looking one. 


Texture test on back wall asset. 


Note: I am going to have a few days off next week, so I probably won't have much to post next week. But I will try to post something. 

Sunday, 18 March 2018

Uvs, Baking, photogrammetry, textures and Pope Benson

Baking, UV mapping and textures 

This week was fairly straight forward with what I had to do, UV map my assets, bake them and began texturing. 


Also, with my concrete textures I began to use them for a base for brick textures. Though critique, I was told to look at the stone used for certain places. I will place this research down below. 


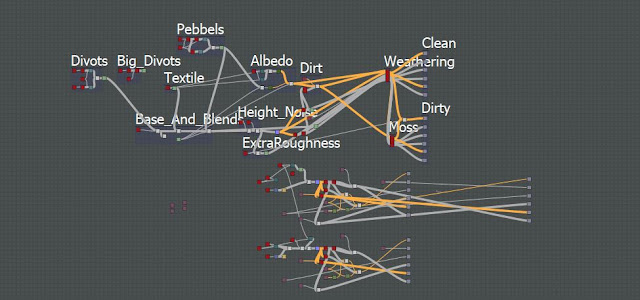
Substance graph: 

As you can see, I built upon the graph for my concrete textures from a few weeks back. 


I was also told that with my former window test, I need to use something similar to what I want to do, otherwise I wouldn't get the right results I was looking for. So I created a stained glass window texture - Pope Benson 

Pope Benson


The stained glass window texture was inspired by my pet dog, Benson. Inspiration photo below texture


 Influence: Benson 


Photogrammetry

The last thing I tested this week was photogrammetry. What is photogrammetry?
The best definition for it is found on photogrammetry.com
"The input to photogrammetry is photographs, and the output is typically a map, a drawing, a measurement, or a 3D model of some real-world object or scene. Many of the maps we use today are created with photogrammetry and photographs taken from aircraft."
Talking to a technician at uni, I found out there's a photogrammetry software for free and which is actually really good. It's called 3DF Zephyr.  As seen above, this is my result following a Tutorial on 3D flow website. Due to having a potato PC, this did take an entire evening to do. 
After my PC got into several hissy fits, the results (as seen above) turned out really well. I will have to look at this again in the future. This was set as a task, but I won't include it in my task submissions as I followed a tutorial for this. But, I am seeing it as an experiment. 

Screen captures whilst working with tutorial: 

Stone used for Notre Dame De Paris: 

I couldn't find too much information on what type of stone that was used for Notre Dame, but what little information I could find is that the original stone that was used was Courville stone and later Lutetian Limestone aka Paris Stone.